A-B Plot Triangulation for Freeform and Asymmetric Pool Shapes
The A-B plot is a method using triangulation to measure Freeform and Asymmetrical pool shapes, such as Kidneys, Humpback Kidneys, Lazy L’s is highly effective. The A-B Plot method should not be used for Symmetric Pool Shapes such as Rectangles, Lazy L’s and Octagons.
A-B Plot Measurement Process – Set-up
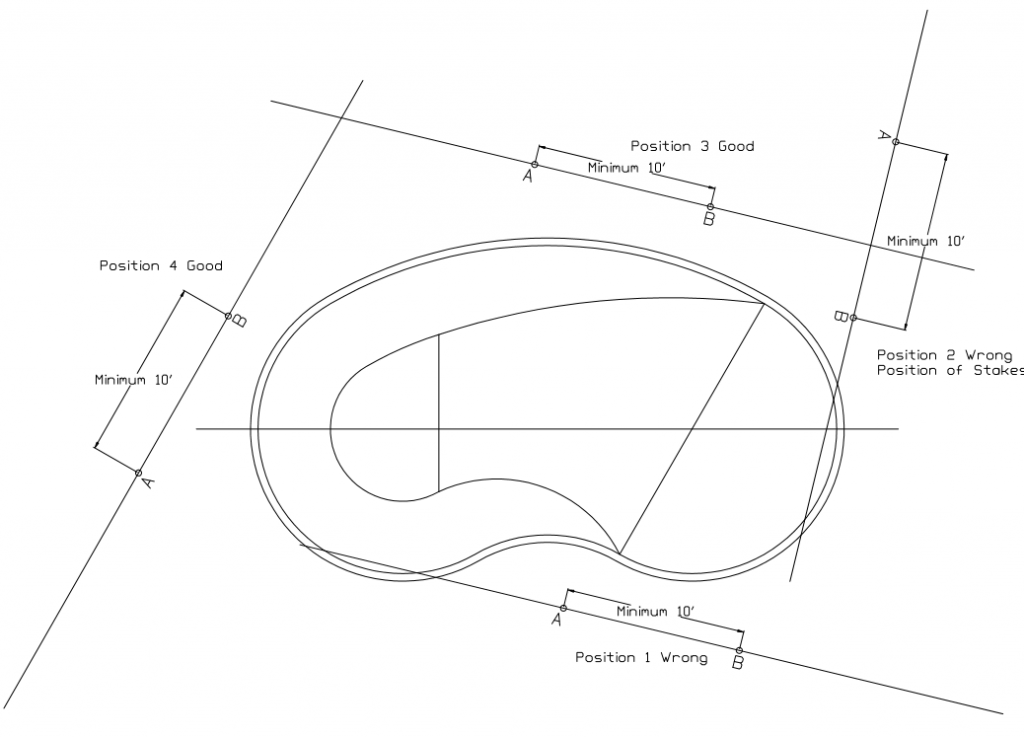
Position two stakes (12” long nails or a piece of ½” steel bar or similar – see Tool Required) at least 10 Feet apart (Ideally 20 Feet) as illustrated in figure above. When positioning the stakes be certain that they are approximately parallel to the centerline or the longest length of pool depending on the shape and a minimum distance of 3 Feet (Ideally 10 Feet) way from the edge of the pool. The stake placement shown on the side of the reverse radius is the ideal position to measure a pool of this nature. Sometimes due to landscaping, or other obstructions, it is not possible to place the stakes on this side of the pool. Please refer to the diagram above for an alternate location on the opposite side of the pool.
IMPORTANT: Positions 1 and 2 must be avoided; when an imaginary line is extended thru both the A and B points if that line does intersect with the pool perimeter that pin location cannot be used.
IMPORTANT: Always make Point A toward the Deep-end of the Pool and Point B toward the Shallow-end of the Pool.
TIP: The stakes can be moved to almost any position around the pool with
Some basic rules to follow:
- Keep both stakes roughly parallel to the centerline of the pool and within the overall width or length of the pool. (see the diagram below for alternate Stake Positions) In any case, if an imaginary line, extended thru the A and B Points intersects with the pool perimeter, that Stake Position cannot be used
TIP: Before taking any measurements, double check to ensure the A and B Stake Positions are a minimum of 10’ apart and record the exact distance between the A and B Stakes.
TIP: Please indicate on the Pool Fits Measuring Sheet, the approximate location and orientation of the A and B Stake to the pool.
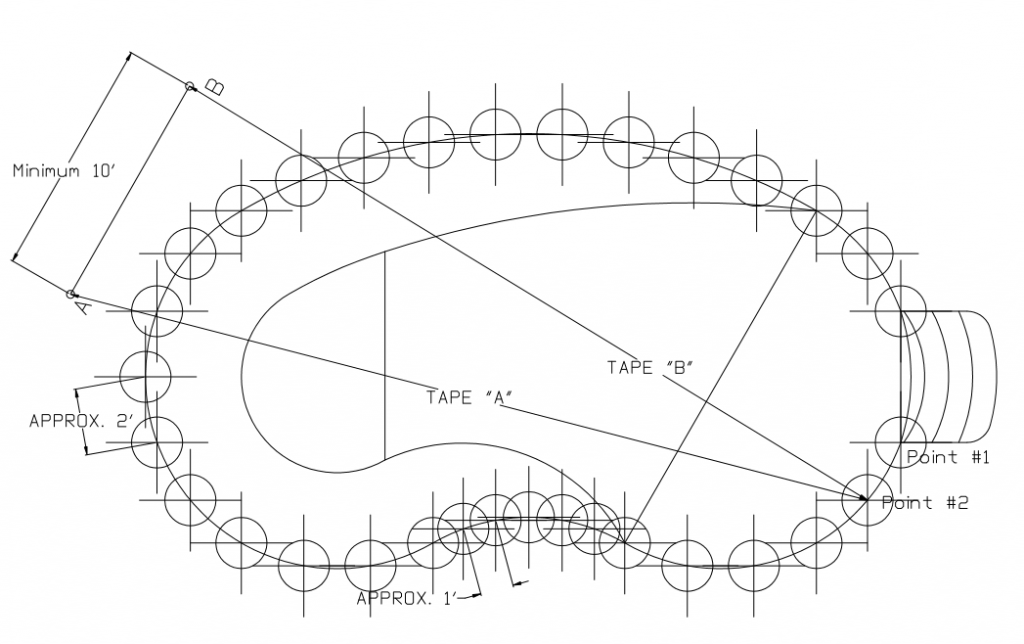
A-B Plot Measurement Process – Marking of Points around the Pool Perimeter
Using chalk, mark the points on the perimeter of the pool at the coping applying the following frequency:
- Every 1 Foot and 6 Inches unless you are measuring:
- A Small Radius – Then every 1 Foot
- A Reverse Radius – Then every 1 Foot
- A Specific Direction Change (i.e. a 45 Degree Corner) – Then to that point exactly.
- Label those Points in Chalk starting at 1 and numbering consecutively until you are within 1 Foot and Six Inches of Point #1.
- If there is a straight wall in the pool points should be marked only at the beginning and end of the straight wall.
- If there is a Preformed Thermo-Plastic or Fiberglass Pool Step points should be marked only at the beginning and end of the straight wall.
- (see diagram below)
TIP: Pick a logical starting point for Point #1 for example at the end of the one side of a Preformed Thermo-Plastic or Fiberglass Pool Step (see diagram below)
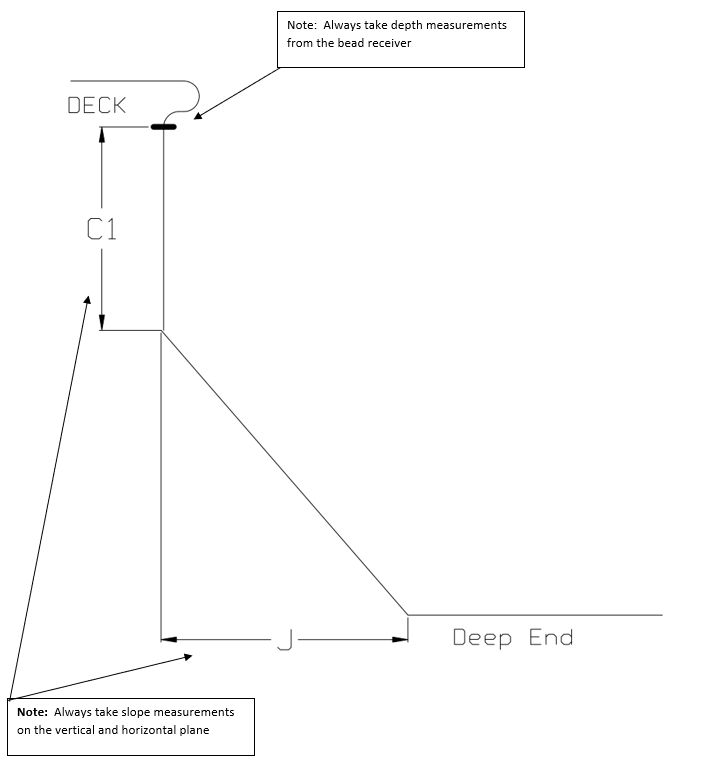
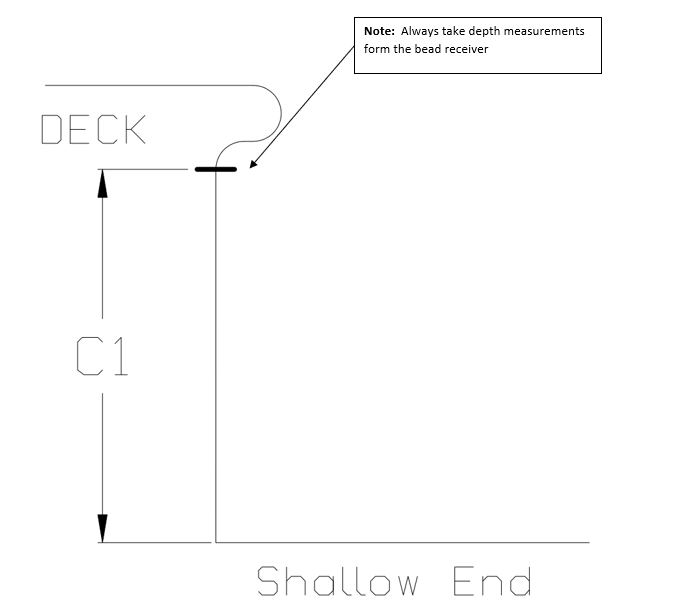
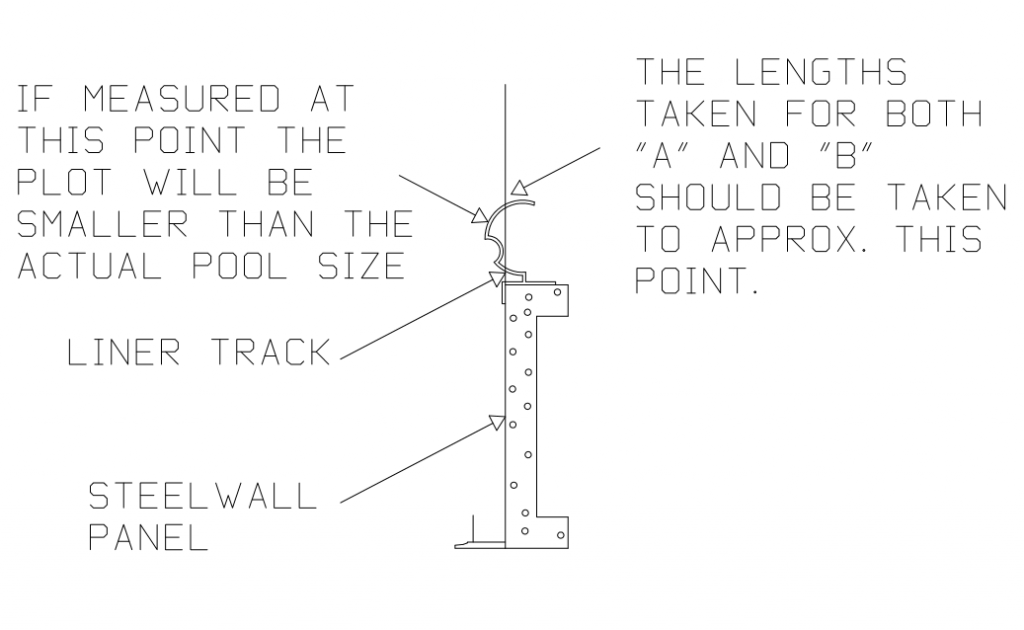
TIP: When marking the Points around the perimeter of the pool make certain that the points are marked directly above the Bead Receiver. (see diagram below)
A-B Plot Measurement Process – Recording A-B Point Measurements
TIP: Mark each Tape Measure with an A and a B respectively. Ideally this can be done with different color masking tape or pen ink. This will help ensure that the two tapes are easily identified during the measuring process and do not get interchanged.
TIP: Make sure that at every point that both the A & B Tapes are:
- Held at the same level as the pool deck
- Not obstructed and held in a straight line between the A and/or B stakes and the point being measured.
TIP: Take both the A and the B Measurements at the same time to ensure accuracy.
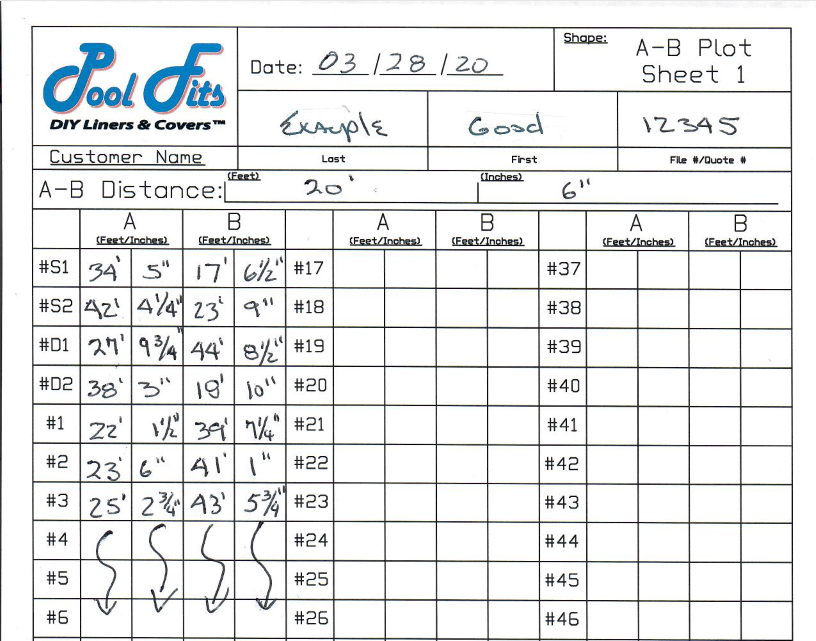
Your now ready to proceed taking and recording the A-B Plot Triangulation Measurements for your pool. With the ends of the tapes fixed to the stakes, stretch the both tapes to the Point # 1 and record that measurement on your Pool Fits A-B Point Measuring Sheet, first taking the ‘A’ measurement to Point 1 (using the measuring tape marked ‘A’ and attached to stake ‘A’) and then the ‘B’ measurement to Point 1 (using the measuring tape marked ‘B’ and attached to stake ‘B’) Repeating the process until all Points marked around the perimeter of the pool are measured.
TIP: Accuracy required is to the nearest ¼” (example. 35’-4 ¼”).
TIP: When marking the Points around the perimeter of the pool make certain that the points are marked directly above the Bead Receiver. (see diagram below)
Recommendation: Pool Fits strongly recommends the use of i-Measure My Pool app for all A-B Plot Triangulation pool measuring. I-Measure My Pool app provides instant feedback and has built in checks that greatly assist the measurer in verification of their measurements!
Properly Measuring S1/S2 and D1/D2 Shallow-end and Deep-end Break-off Points
The Shallow-end (S1/S2) Break-off and Deep-end Pad Break-off (D1/D2) must be defined when the pool is measured. These Break-off points can be easily measured on Symmetrically Shaped pools, such as Rectangles, Ovals or Grecians. When a pool is Asymmetric, such as any Freeform, Kidney or Lazy L shaped pool, then locating the Shallow-end (S1/S2) Break-off and Deep-end Pad Break-off (D1/D2) is more a bit more challenging. The diagram below will help to understand how this is done. is of the defined transition line but the pad can be sometimes difficult to measure. (see image below)
TIP: Locate and measure the Shallow-End Break-off points 1st. Locate these on the perimeter of the pool as shown on the diagrams above.
TIP: Locate and measure the Deep-End Break-off points 2nd. Locate these on the perimeter of the pool as shown on the diagrams above. The easiest way to accomplish this is to use 1 – 100’ tape measure with a person on either end of the tape. Position the tape measure directly over the transition point of where the ‘hopper pad’ meets the long slope to the shallow-end of the pool. Using chalk, mark on the pool deck or coping where the tape measure intersects with the wall of the pool. Mark those points as D1 & D2, per you Pool Fits Measuring Sheet and measure to these points. Record these points in the boxes provided on the Measuring Sheet.